

How to Use Cloud Images for Faster VM Deployment in Proxmox VE
You may be familiar with croit as a company that makes your Ceph and DAOS cluster management a snap, but did you know that we are here to help you have a great experience with Proxmox? At croit we love and support Proxmox.
Something you may be unaware of in Proxmox VE is the ability to use cloud images from the major Linux distributions. There are some serious advantages to using a cloud image rather than doing OS installs from an ISO and then cloning that VM. Some major advantages include that they boot lightning fast, using a cloud-init drive you can simplify deployment of the OS, and growing the disk is seamless.
Sounds great right? Well, how do deploy a VM using a cloud image? It’s fairly easy and in this guide, we’ll cover the basics of setting up a template, cloning it, and using cloud-init to manage some basic settings.
Creating a cloud image template
Almost every major Linux distribution has cloud images available for use. This guide uses Ubuntu Server 24.04, but the process will be the same for any distribution.
First, we’ll create an empty VM with no disks, next we import the image to the VM we created, then add the disk to the VM, and finally add a cloud-init drive.
Create an empty VM
You should adjust the example command below to best fit your desired template. For example, the number of cores and amount of memory are both probably lower than you’d generally want for a VM cloned from this machine. For more information about these settings, please refer to the official documentation for QEMU VMs.
qm create 990001 \
--name ubuntu-2404-cloud-init \
--description "Ubuntu 24.04 Cloud Init template" \
--ostype l26 \
--cpu cputype=host \
--cores 1 \
--sockets 1 \
--memory 2048 \
--scsihw virtio-scsi-pci \
--net0 virtio,bridge=vmbr0
Note that it is possible to do this step from the Proxmox interface, but in the OS tab you would select the “Do not use any media” option and in the Disks tab you would delete scsi0.
Import cloud image to the new VM and attach it
Now you need to download the cloud image you wish to use to your Proxmox VE node.
wget -O /tmp/noble-server-cloudimg-amd64.img \
https://cloud-images.ubuntu.com/noble/current/noble-server-cloudimg-amd64.img
Once that’s done, import the image to the VM created above.
qm importdisk 990001 /tmp/noble-server-cloudimg-amd64.img local-lvmNote that this step must be done on the command line as the Proxmox interface does not currently support these functions.
Now attach the disk to the VM
qm set 990001 --scsi0 local-lvm:vm-990001-disk-0Finally, set the VM to boot from the new disk image on scsi0
qm set 990001 --boot c --bootdisk scsi0Final steps
We have a couple of last steps to finalize the template VM setup.
Some cloud images expect to have a virtual console rather than a virtual monitor attached to them so we will set our new VM to use a serial console instead. For that, we need to add a serial port and set the console output to use that port.
qm set 990001 --serial0 socket --vga serial0We are going to use cloud-init to manage the VM settings, so we need to add a cloud-init disk for our VM
qm set 990001 --ide2 local-lvm:cloudinitSince we don’t want this VM to be booted and used like a normal VM we want to convert it to a template.
qm template 990001Using the template to create ready VMs
So you did all that work to create a template VM and you still don’t have a working machine. The good news is that all the work you just put in is about to pay off in time saved for future VMs created.
In the previous section, we used the command line because there is one step where we cannot use the interface so it makes sense to use the command line for the whole thing. In this section, you’ll be using the web interface.
Cloning the template VM
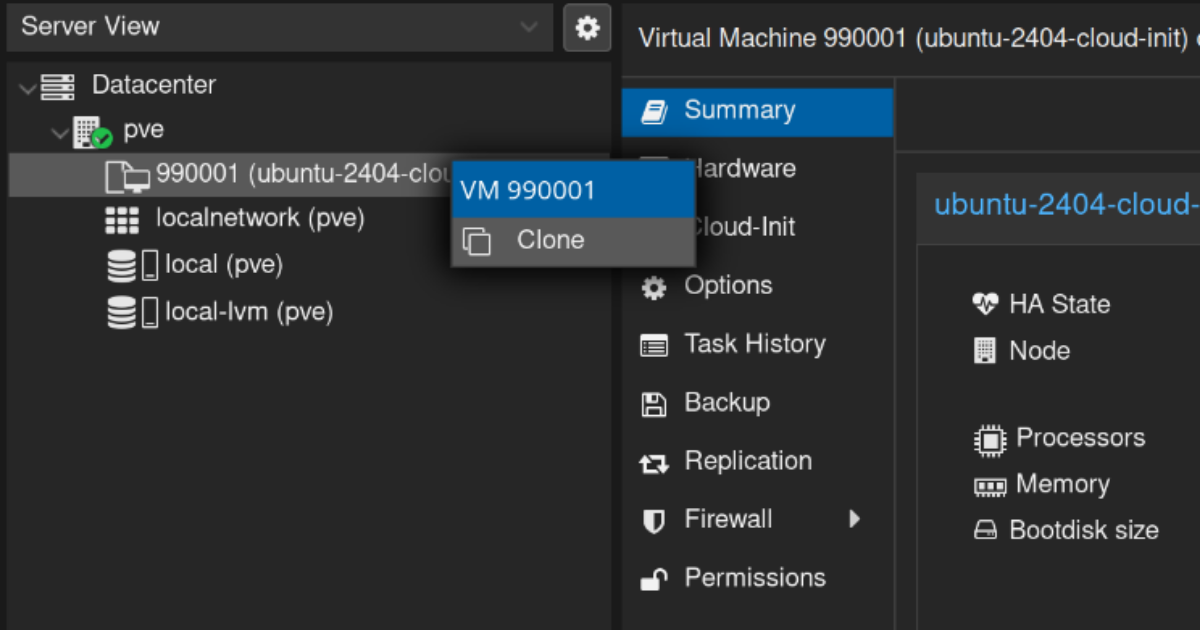
Having completed the previous section, creating the template, we have basically done all the work we need to do. Now, simply select the template VM, right click and select Clone.
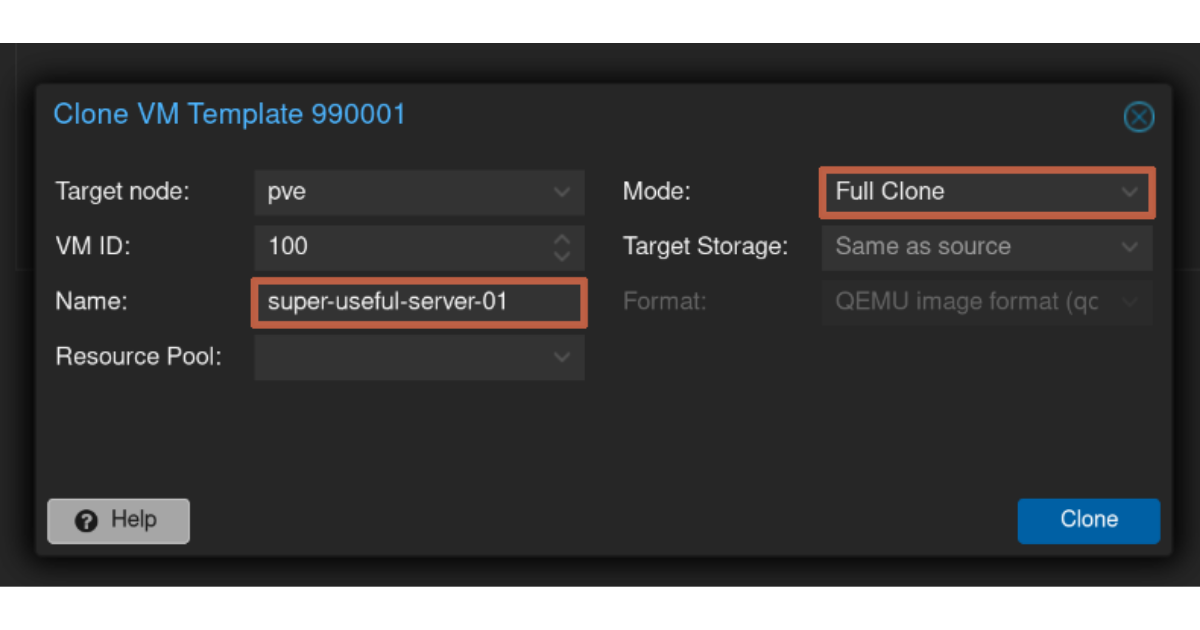
Fill out the fields in the dialog highlighted below. The name is a given, but the clone mode should be “Full Clone”. Doing so ensures that the new VM is fully independent of the original template. You can replace and delete it as you wish; the cloned VM is unaffected.
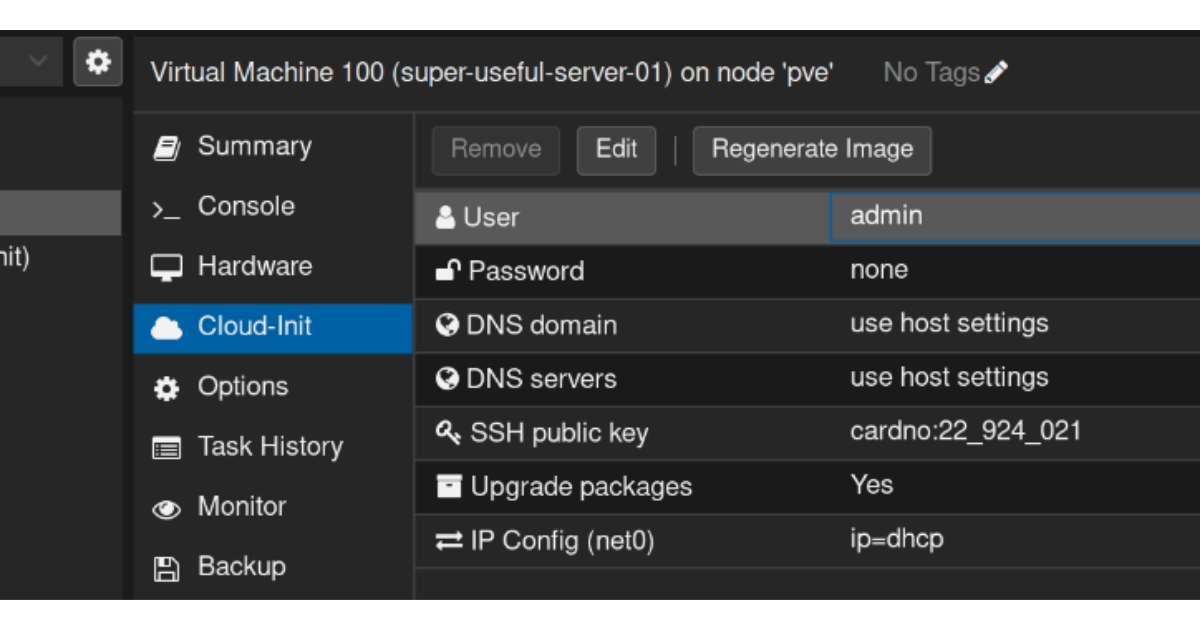
Setting cloud-init parameters
Here is where the big payoff comes, you can set the most common options in the “Cloud-Init” section for your new VM to configure initial authentication and network settings.
It is possible to set additional cloud-init options with a custom file. Please refer to the official cloud-init support wiki page for more information.
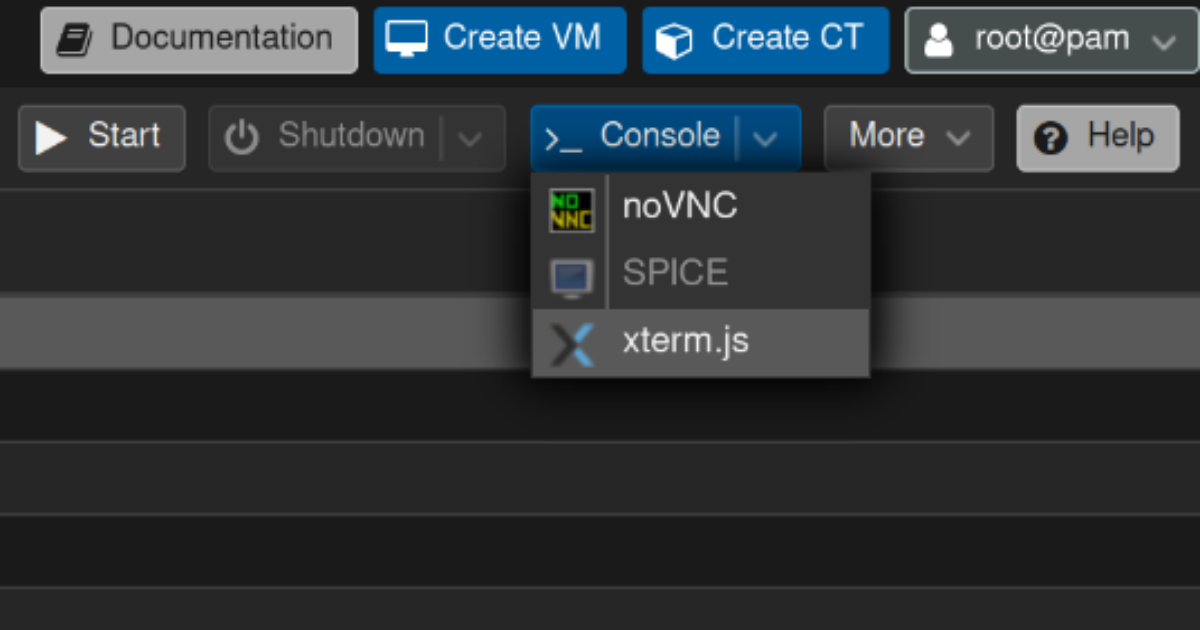
Observe the VM booting
Earlier in this tutorial, you set the Display Mode to be serial0. You can still use the default “noVNC” console for this VM to watch it boot, but you can also use the xterm.js console which is much more useful. It offers clearer text as well as a scrollback buffer. This makes it easier to catch any errors that occur during the early phases of the boot process.
Now, start the VM, sit back, and enjoy not having to install from ISO or worry about changing a bunch of settings from having to clone a “gold” VM image.