
- Getting Started Configuration Accessing Your Cluster Hypervisors Maintenance
- Updating croit
- Replacing OSDs
- Replacing NIC
- PG numbers
- Updating Ceph
- Migrating or restoring croit container
Installation
The Management Node
To install croit, you'll need a physical or virtual machine that will serve as the entry point to your cluster.
Minimum Compute requirements:
- At least 8GB of RAM
- At least 100GB of flash storage (for metrics and logs)
- At least 4 CPU cores
Recommended Compute requirements:
- 8-core CPU
- 32 GB memory
- 1TB+ NVMe (redundant if physical)
- 10GbE NIC (Dual port if physical)
Additional requirements:
- Linux with Docker version 25 or later installed
- Internet connection (to connect to api.croit.io; for air-gapped installations, please contact us)
- Network access to the cluster nodes
We strongly recommend the following:
- Disable any firewall between the management node and your cluster nodes.
- Ensure no NTP service is running on the management node, as our Docker container includes its own NTP.
- Disable SELinux (Permissive should work as well).
Installing croit is simple. Log in to your management node and execute the following command:
docker run --rm -it --pull=always \
  -v /var/run/docker.sock:/var/run/docker.sock \
  croit/croit:latest /croit/bin/croit setup


  #                 _   _
  #   ___  _ _ ___ (_) | |
  #  / __|| '_/ _ \| ||  _|
  #  \___||_| \___/|_| \__|

  # croit data storage solutions

  # Image: croit/croit:latest
  # Pulling image... using local image.

  # No existing croit container found. Starting new setup.

  # HTTP proxy URL (leave empty for none):
  # HTTPS proxy URL (leave empty for none):

  # Creating croit container... done
  # Starting croit container... done
  # Waiting for croit to become ready... done

  # Setup complete!

  # Admin username:  admin
  # Admin password:  eVbzuDwaPHZerhJCVBWGukmYQZWIxW7B

  # Open https://<your-server-ip> in your browser to get started.
To use a specific Ceph version, replace croit/croit:latest with croit/croit:latest.reef|squid|tentacle.
You can always rerun this command to update croit to the latest version.
If you are using podman or just don't want to pass the docker socket you can use docker compose. Note: we strongly recommend using our built-in docker management instead. We don't officially support compose and updates might behave unexpectedly.
services:
  croit:
    container_name: croit
    restart: unless_stopped
    network_mode: host
    cap_add:
      - SYS_TIME
      - NET_ADMIN
    volumes:
      - config:/config
      - db:/var/lib/mysql
      - logs:/logs
      - metrics:/stats
      - images:/images

volumes:
  config:
  db:
  logs:
  metrics:
  images:
croit
Once the container is running, croit will be accessible at https://[hostname|ip-address] with a self-signed certificate.
Credentials
Log in with username admin and the password that was generated during the setup.
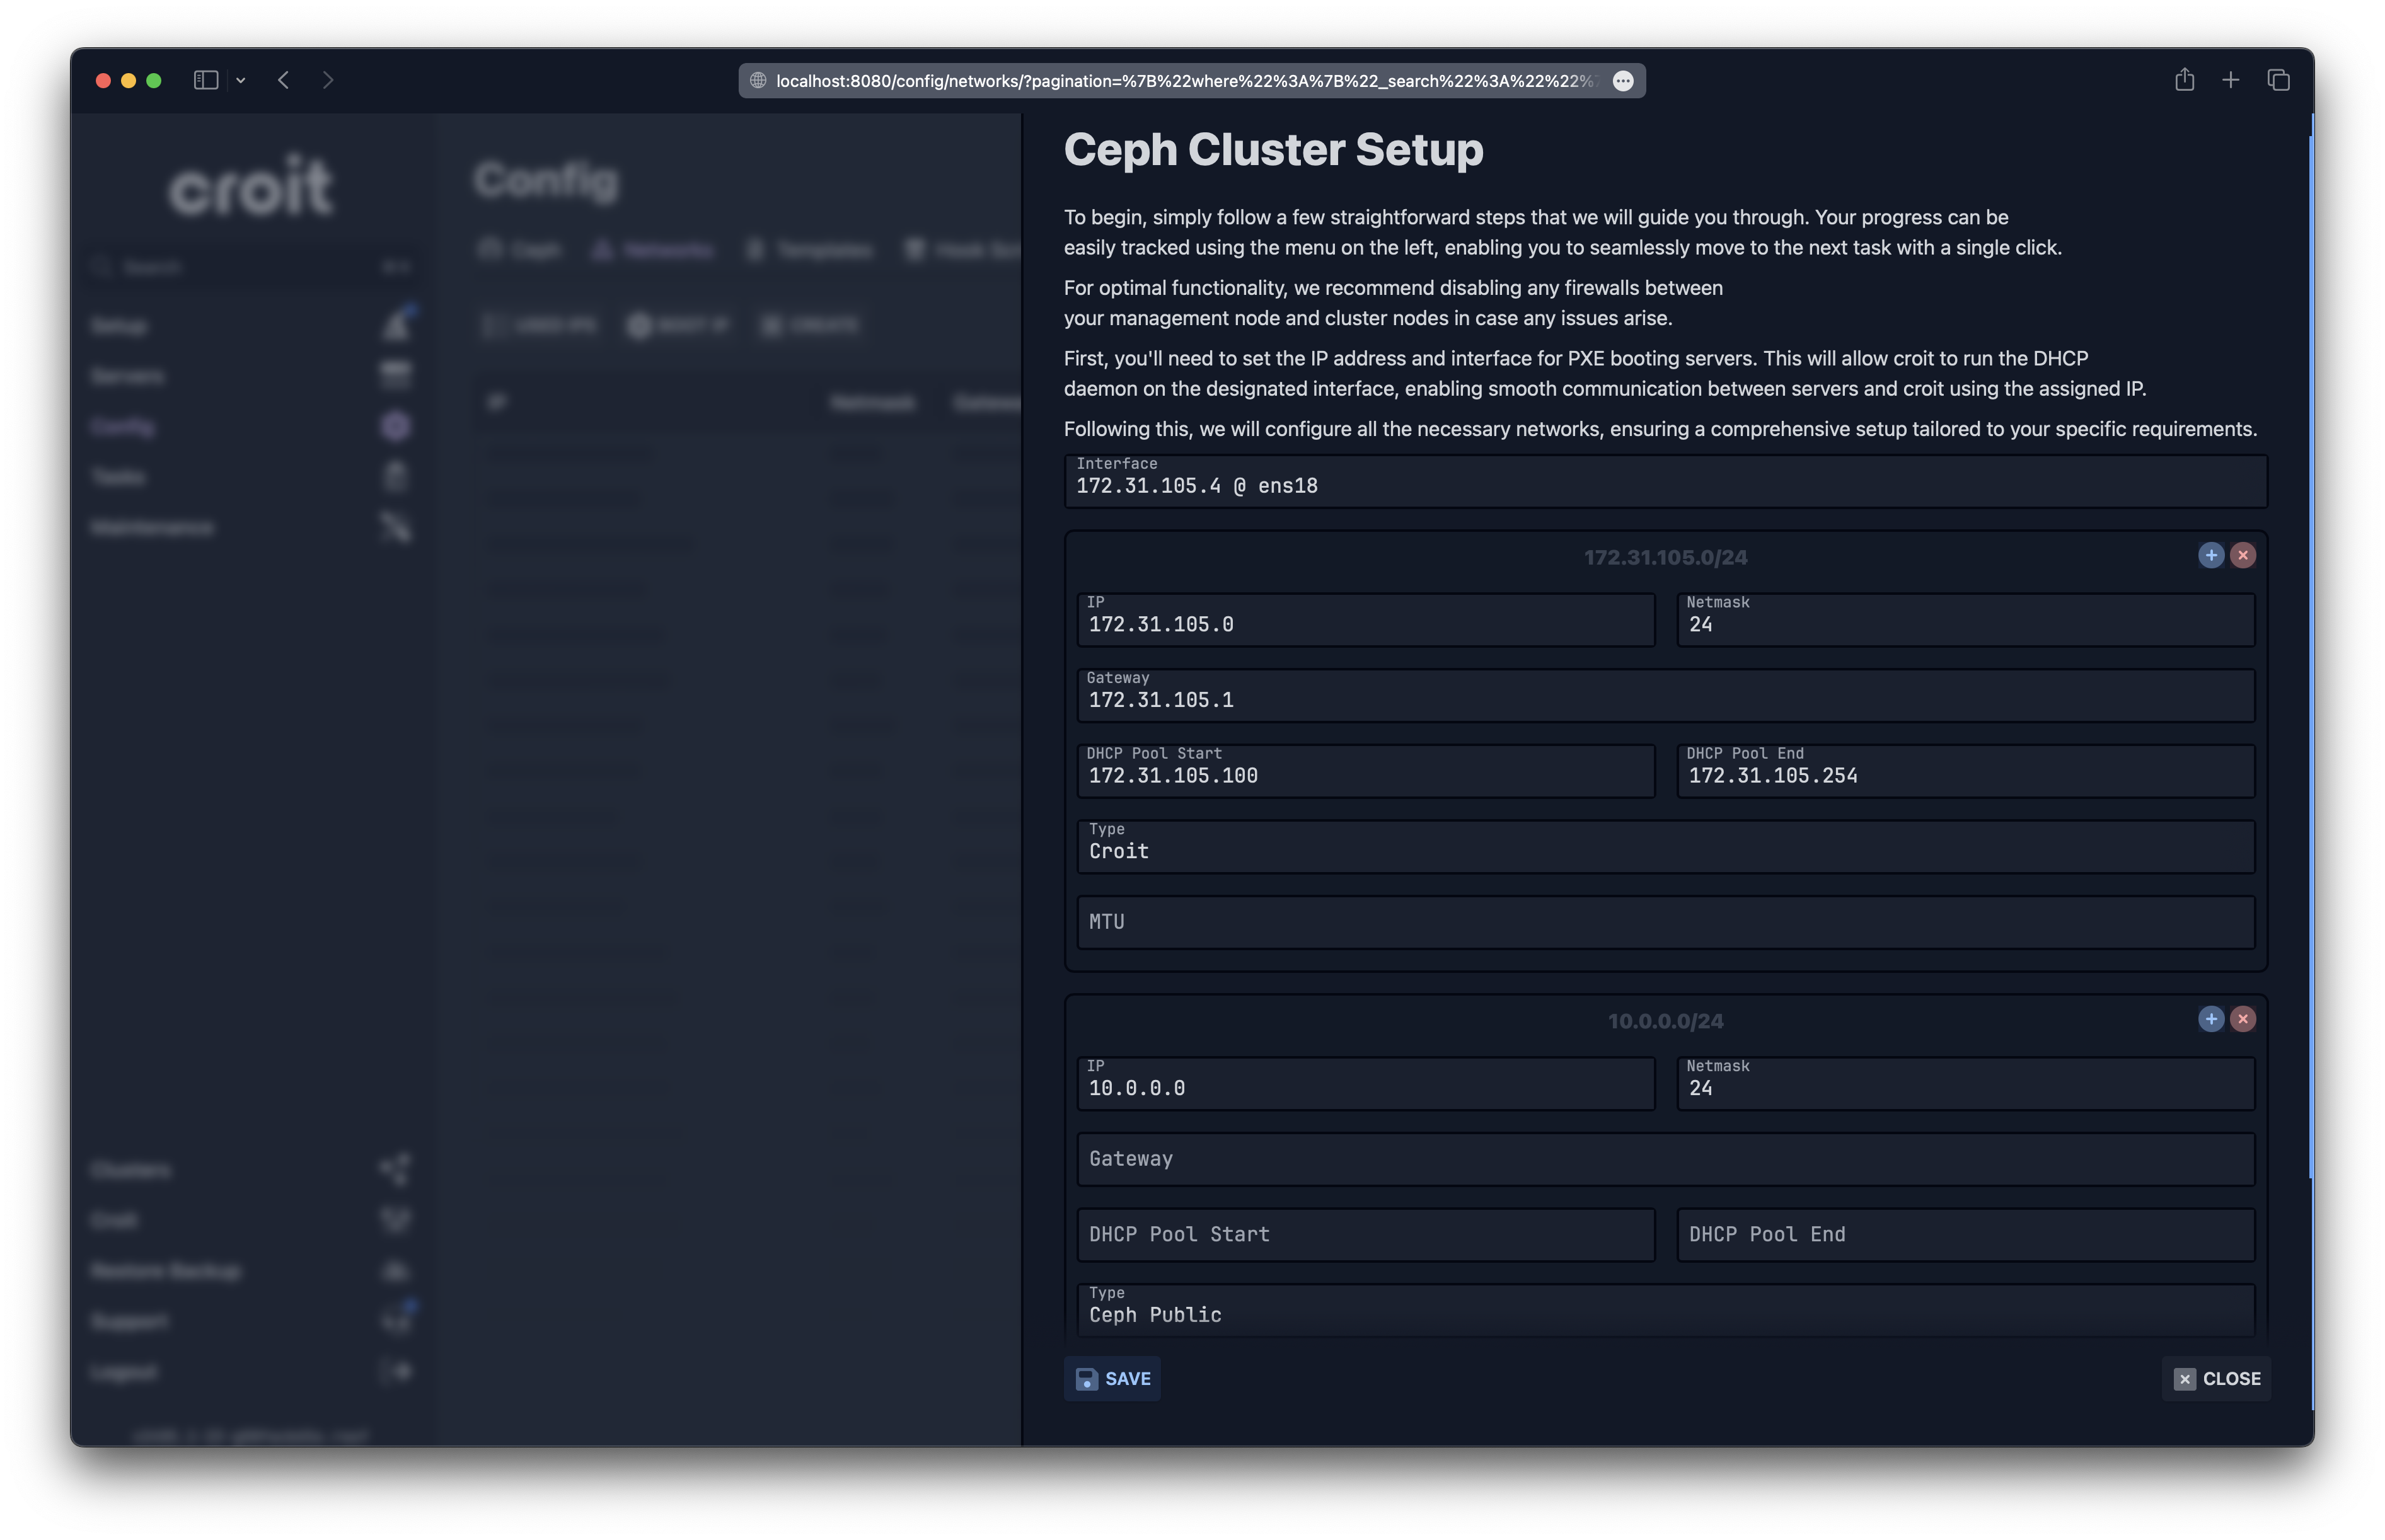
Setup
Once logged in, croit will automatically guide you through the initial setup. First, it will prompt you to select the interface and IP used for PXE booting and communication with the cluster nodes. You'll also be asked to add any cluster networks.
Network
To use croit, all your cluster nodes need access to a dedicated network where croit provides DHCP PXE boot. Avoid installing croit within the same Layer 2 network as your other servers or desktop systems. croit fully supports VLAN tagging for network segmentation.
For production setups, we recommend using two different networks:
- Management Network: Connects the management node to the Ceph servers and is used for PXE boot and administrative traffic. This network does not need to be accessible from the outside.
- Ceph Network: Used for Ceph cluster traffic and client traffic. This network can be split into two dedicated networks for cluster traffic and client traffic. The network serving client traffic needs to be reachable from all storage clients and the management node.
You can use switches from your preferred network vendor. We have successfully deployed croit with various switch vendors, including Arista, Juniper, and Cisco. See Networking & Switches for help.
Note: When using Cisco switches, we recommend enabling the fast-booting feature on all ports used for PXE booting croit servers.
Requirements:
Management Network:
- >= 10 Gbit/s
- Redundant (LACP) strongly recommended
- Untagged (access port) at the Ceph nodes to facilitate PXE boot
- Layer 2 connectivity or DHCP relay between the management node and storage servers
Ceph Network:
- >= 2x 10 Gbit/s
- Redundant (LACP) strongly recommended
- Layer 3 connectivity between all storage nodes and clients
Nodes running Ceph MON services need an IP address that is reachable from all Ceph consumers. A Ceph MON only listens on a single IP (constraint from Ceph). It must be reachable from:
- The management node
- All Ceph servers
- All Ceph clients
Booting
Everything required to boot your servers is now configured.
Please ensure that you have configured PXE boot as the first boot option from the correct NIC in the system’s BIOS/UEFI, then power on your servers.
Caution: Ensure that the Option ROM setting of the NIC you want to use is set to PXE.
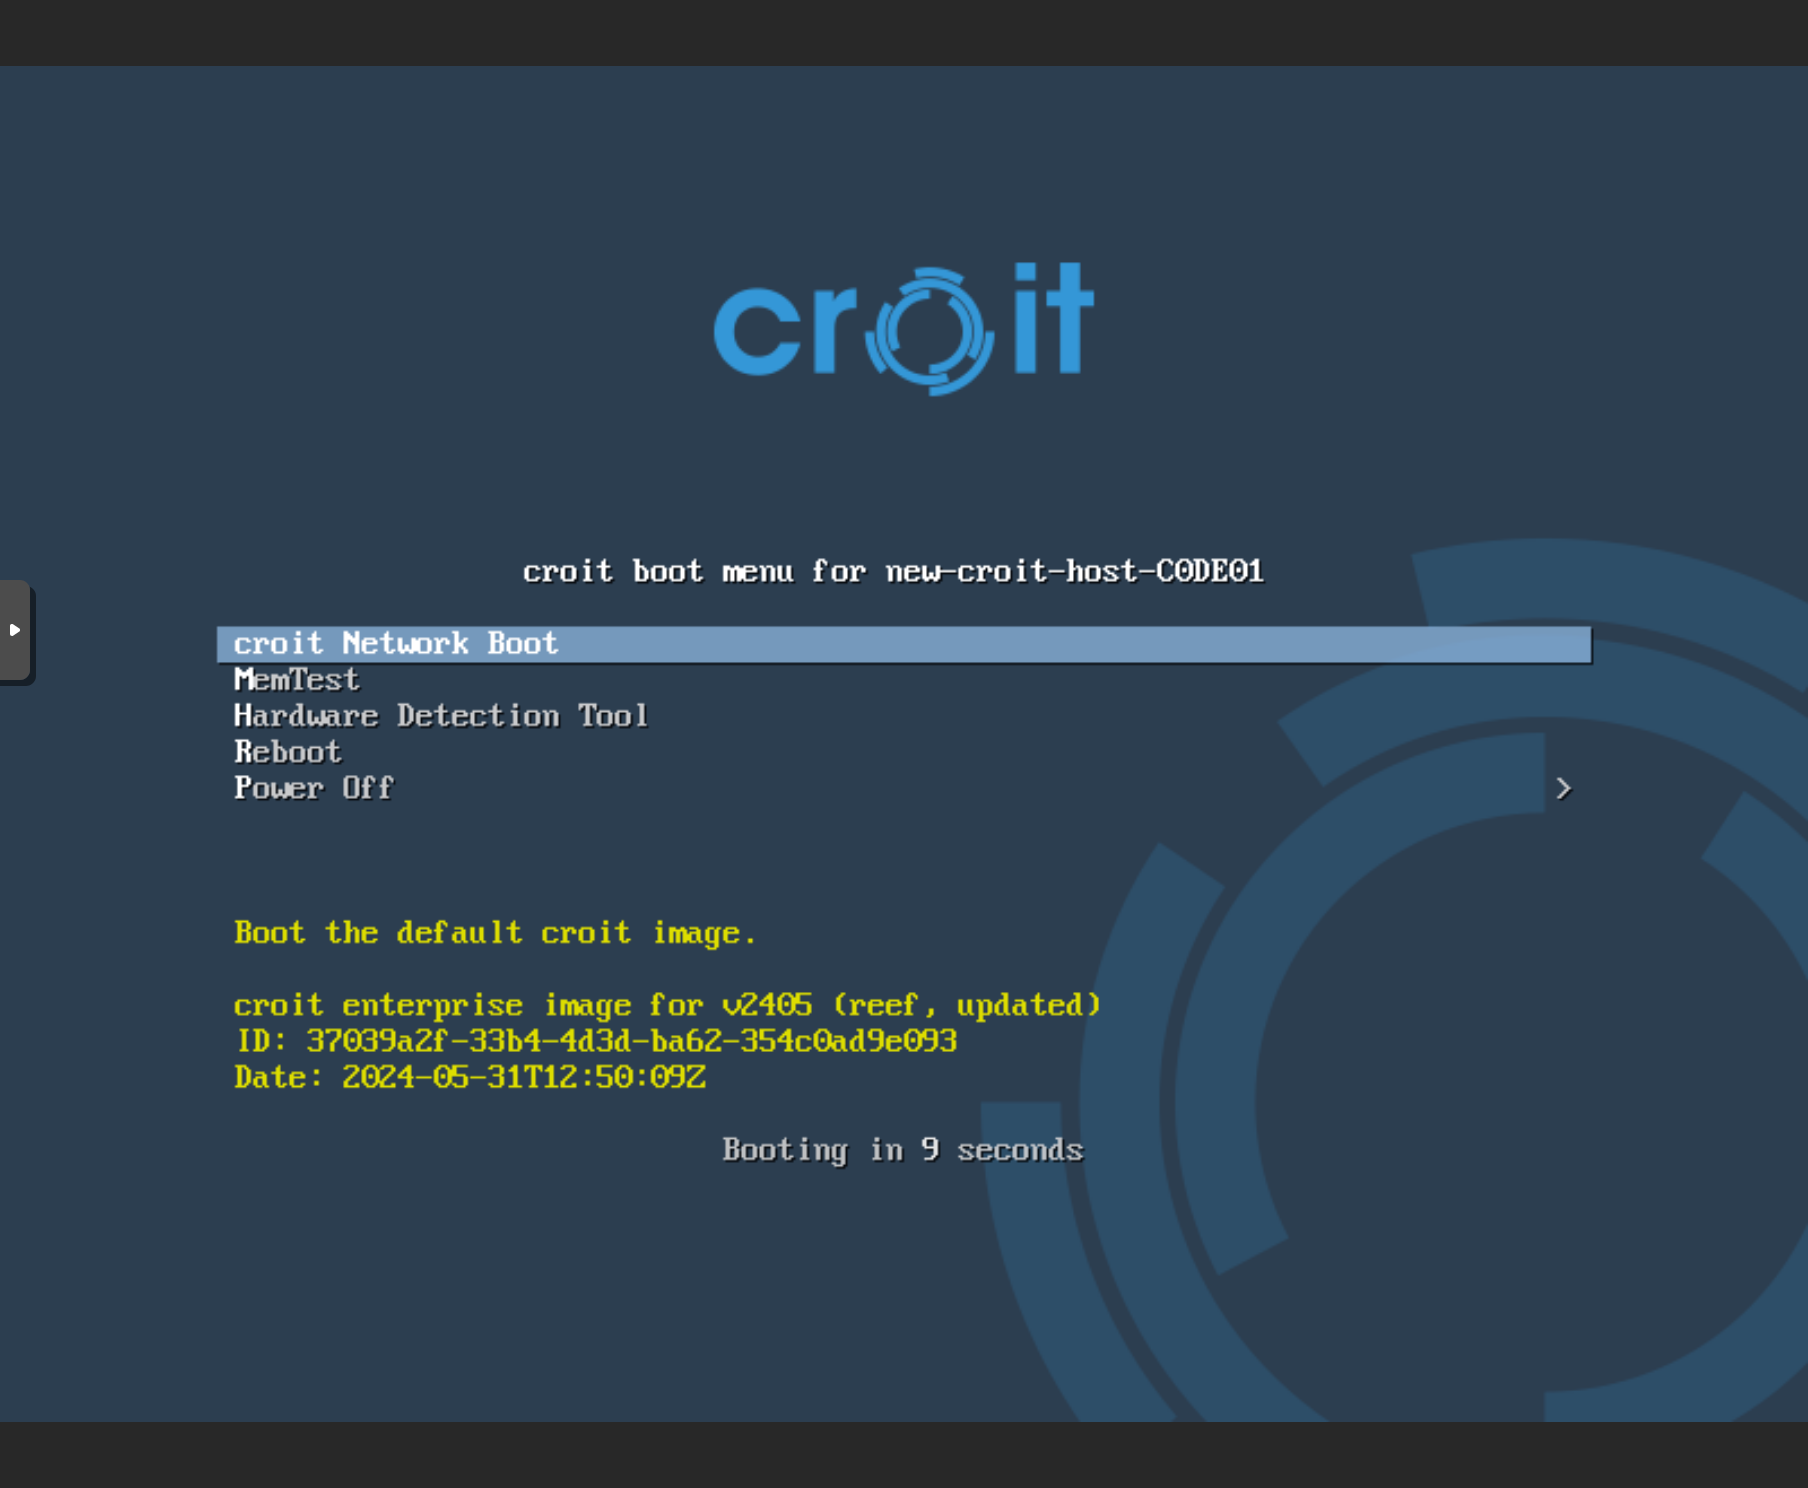
Caution: The live image is downloaded asynchronously from croit.io after the first start. The menu will instruct you to wait and retry if the download is not yet finished.
The server will automatically boot our live image and will appear in our UI as soon as you see the boot menu. Rename the server by setting the hostname using the Edit button.
MON Deployment
A few seconds after the first node boots, you will be prompted to select a MON disk to trigger the cluster deployment.
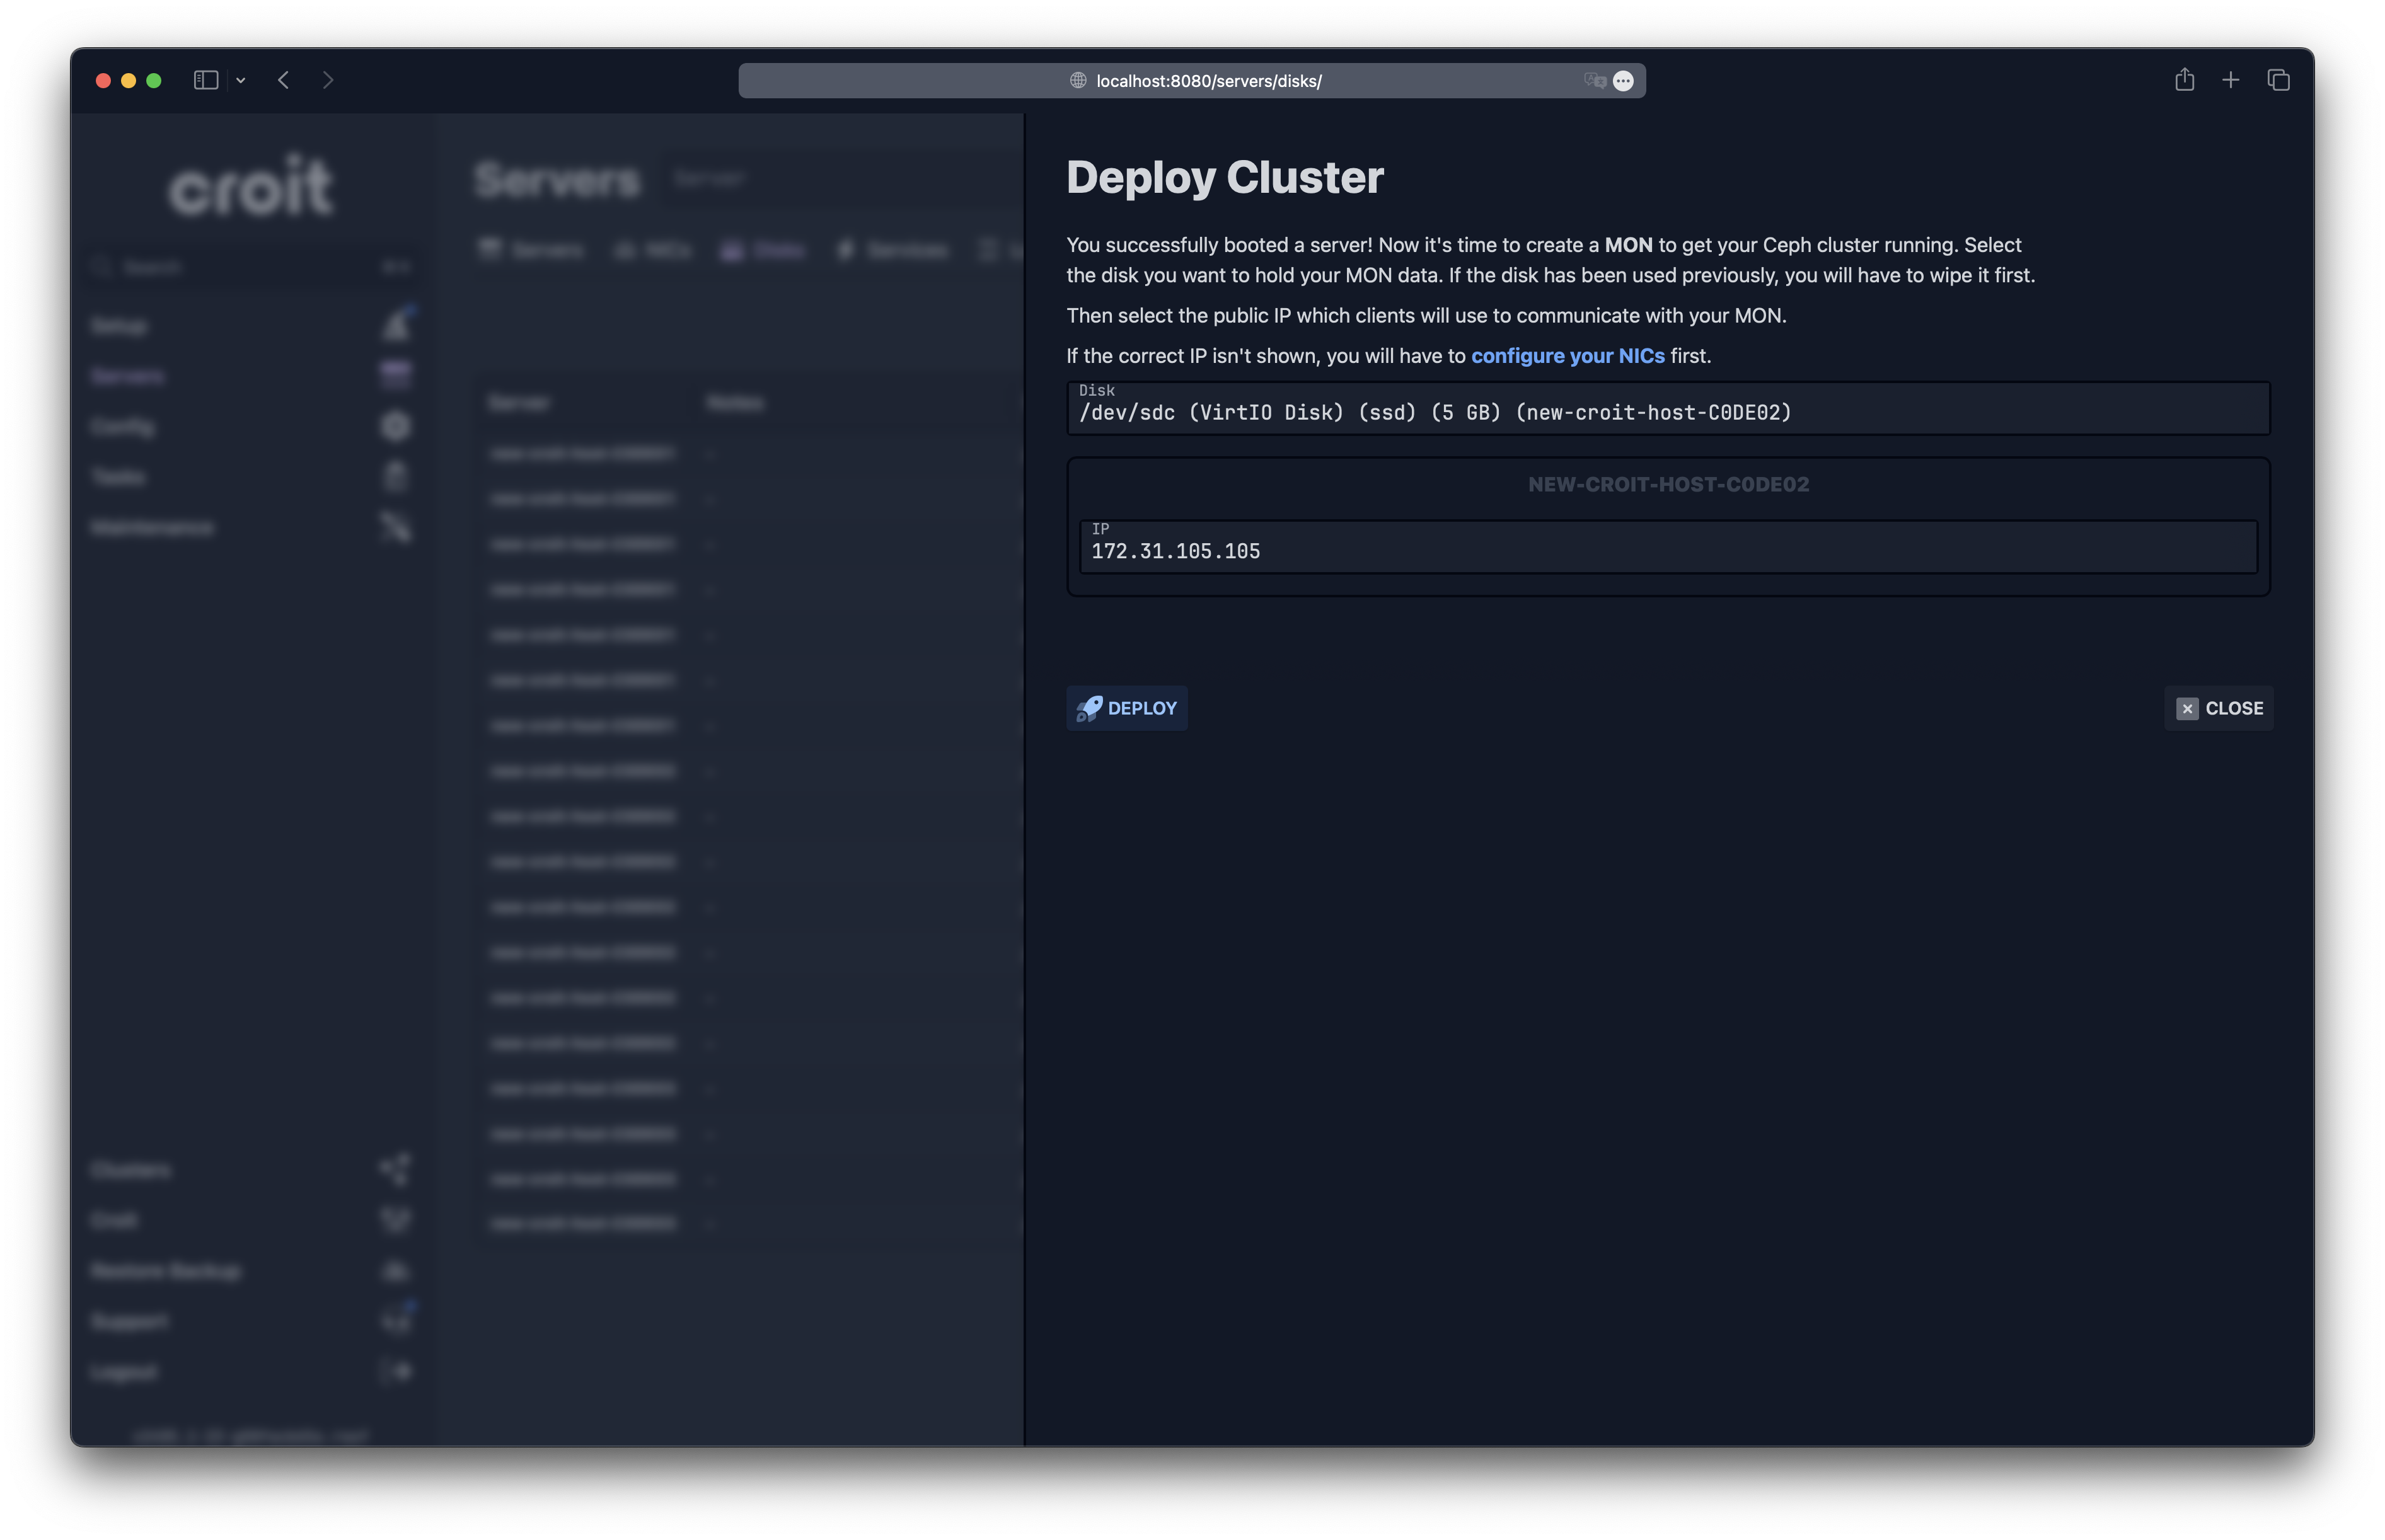
Caution: A Ceph MON has exactly one IP address (even if the server has multiple IPs). This IP needs to be reachable by all Ceph services, clients, and the management node. You can return to the previous step to configure additional networks if the desired one is not shown here.
OSD Deployment
Now that the cluster has been deployed, OSDs (object storage daemons) are still needed. Let's navigate back to the disks view: Servers -> Disks. Select all the disks you wish to use for storage and then click on Role -> Set to OSD.

Additionally, you will need to deploy more MONs in the same manner by selecting the disks and clicking on Role -> Set to MON. The total should be either 3 or 5 (odd numbers are important).
That's it! If you struggle along the way, don't hesitate to contact us at feedback@croit.io.